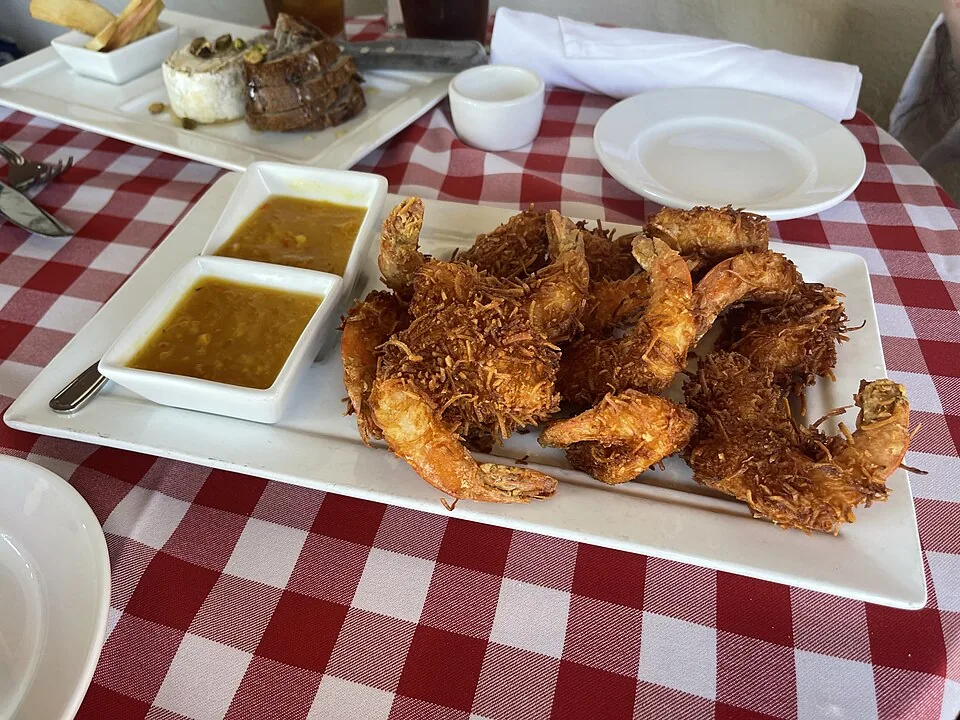
Coconut Shrimp
Crispy coconut-crusted shrimp with sweet chili dipping sauce.
Updated: Oct 6, 2026
Why you'll like it
- Ready in about 35 minutes.
- Serves 4 — easy to halve or double.
- Easy level — everyday equipment only.
- Storage, freezing and reheating covered below.
Coconut Shrimp takes about 35 minutes and serves 4. Coconut shrimp pairs a sweet, crunchy coating with tender shrimp for a restaurant-style appetizer that cooks quickly at home.
Helpful guides
Instructions
Pat the shrimp fully dry with paper towels and season lightly with half the salt and pepper. Set up three shallow bowls: flour in the first, beaten eggs in the second, and coconut mixed with panko, paprika, and remaining salt in the third. Dry shrimp help every layer grip.
Dredge each shrimp in flour, shaking off excess, then dip in egg, letting extra drip back. Press firmly into the coconut mixture, coating all sides, and set on a tray. Rest breaded shrimp 5 minutes so the crust adheres before frying.
Heat 1 cup oil in a large skillet over medium-high heat to about 350°F; a pinch of coconut should sizzle steadily. Fry 5 to 6 shrimp at a time for 2 minutes per side until deep golden and crisp. Crowding drops the temperature and loosens coating.
Lift shrimp with a slotted spoon to a wire rack set over a sheet pan, seasoning lightly with salt while hot. Frying in batches keeps the oil hot and each round evenly browned. Let oil return to temperature 1 minute between batches.
Check that shrimp are pink, firm, and opaque inside; cut one open from the first batch to confirm. Serve immediately with sweet chili sauce and lime wedges. The crust is crispiest in the first 15 minutes off the heat.
Cool leftovers within 2 hours and refrigerate in a single layer. Reheat in a 400°F oven or air fryer for 5 minutes until crisp and steaming to 165°F. The microwave softens the coconut crust and is not recommended for this dish.
Troubleshooting — fixes, not repeats
- If coating falls off, pieces were wet or the crust did not rest; pat shrimp dry, press firmly, and rest breaded shrimp 5 minutes before frying.
- If shrimp taste greasy, the oil was too cool; keep it near 350°F, fry small batches, and drain on a rack rather than paper towels.
- If coconut darkens before shrimp cook, lower heat slightly; sweetened coconut browns fast, so watch color and adjust between batches.
- If crust softens, shrimp sat too long; fry the last batch as guests sit down and serve each round immediately while crisp.
Make it your way
- Spicier version: For extra heat, add cayenne to the coconut mix and serve with spicy mayo.
- Old Dhaka style: For an air fryer version, spray breaded shrimp with oil and cook at 400 degrees for 8 minutes, flipping halfway, until golden.
- Serving with rice or naan: For a main dish, serve over coconut rice with mango slaw.
- Swap orange marmalade mixed with horseradish for the chili sauce.
- Keep shrimp size and frying temperature unchanged across versions.
Storage & reheating
Cool leftovers within 2 hours, then refrigerate in a covered container and use within 3 to 4 days. Reheat only the portion you will eat until steaming hot throughout — poultry and reheated rice should reach 165°F (74°C).
Reheat in a 400°F oven or air fryer until crisp and steaming to 165°F throughout.
Freezing is not recommended, since thawing softens the coconut coating.
FAQ
Sweetened or unsweetened coconut?
Sweetened shredded coconut browns faster and gives the classic restaurant flavor most families expect. Unsweetened works with a milder taste and slower browning; add a teaspoon of sugar to the mix if desired. Either type must be shredded finely so it sticks to the egg layer.
Can I bake instead of fry?
Yes. Spray breaded shrimp with oil and bake at 425°F for 10 to 12 minutes, flipping once, until golden and opaque. The crust will be lighter and less crisp than fried but still tasty. An air fryer at 400°F gives results closer to frying.
How do I keep the coating on?
Dry shrimp, a full flour-egg-coconut sequence, and a 5-minute rest before frying matter most. Press the coconut on firmly and fry in small batches so pieces do not knock together. Handle gently with tongs, turning only once per side.